Introduction
This guide addresses two of the most frustrating defects that novice and experienced users encounter: layer delamination and under‑extrusion. Readers will learn why these problems occur, how to diagnose them, and which practical solutions restore reliable print quality. The article also recommends affordable, high‑performance printers that simplify troubleshooting and prevent future failures.
By the end of the guide, the audience will be able to identify root causes, apply systematic fixes, and adopt best practices that reduce waste and downtime. The information is grounded in real‑world user experiences from the products listed below.
Background and Context
Fused filament fabrication (FFF) builds objects by depositing molten plastic layer by layer. Successful adhesion between successive layers depends on precise temperature control, consistent filament flow, and accurate mechanical motion. When any of these parameters drift, the printer may produce prints with gaps, weak bonds, or missing material.
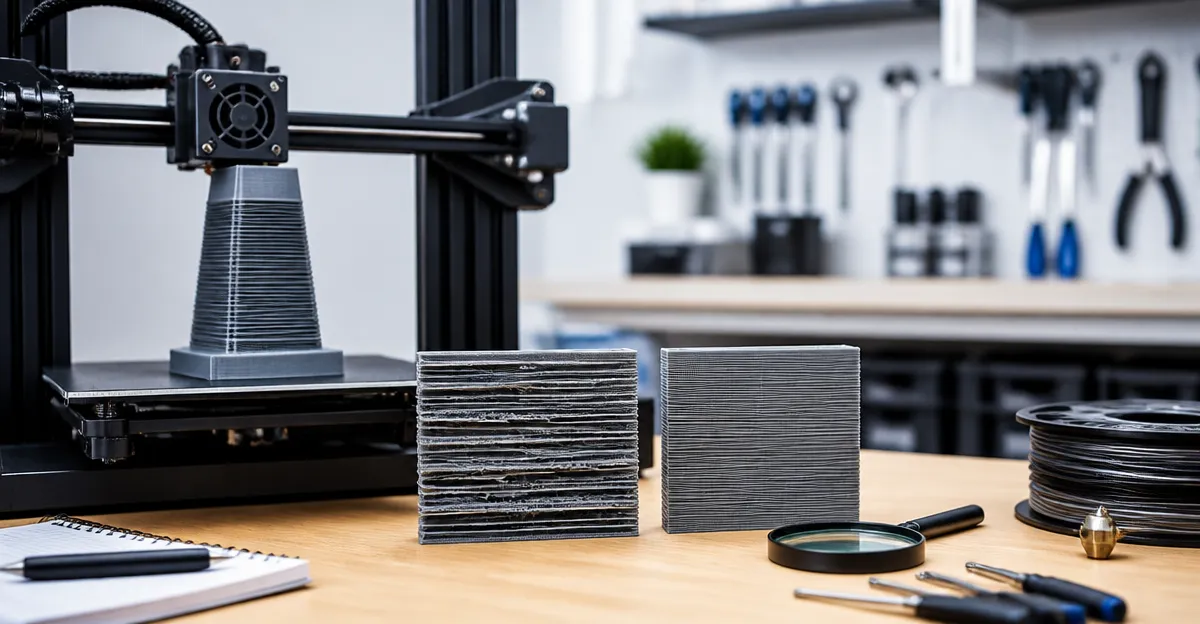
Layer delamination occurs when the bond between two adjacent layers fails, resulting in a printed part that separates under stress. Under‑extrusion happens when the extruder supplies less material than required, creating thin walls, gaps, or incomplete features. Both defects share common culprits such as nozzle clogging, incorrect slicer settings, and inadequate bed adhesion.
Understanding the interaction of hardware, software, and material properties is essential before attempting corrective actions. The sections that follow break down each factor and provide actionable steps.
Identifying the Symptoms
Before any repair, confirm the defect through visual inspection and simple tests. For delamination, gently flex the part; if layers peel apart, the bond is weak. For under‑extrusion, examine walls for uneven thickness or visible gaps, and listen for a sputtering sound from the extruder during printing.
Document the temperature readings on the nozzle and heated bed, as well as the print speed and fan settings. Compare these values against the filament manufacturer’s recommendations. Recording the observations in a troubleshooting log helps track which adjustments improve the outcome.
Hardware Checks and Calibration
Most hardware‑related issues are resolved by calibrating the printer’s motion system and extrusion mechanism. Begin with the Flashforge Adventurer 5M, a budget‑friendly model that includes one‑click automatic bed leveling and a CoreXY all‑metal frame. Its 600 mm/s travel speed and 280 °C direct extruder provide a stable platform for testing calibration procedures.
Perform the following steps:
- Run the built‑in auto‑leveling routine to ensure the nozzle‑to‑bed distance is uniform across the build surface.
- Verify the extruder steps‑per‑mm setting using a calibrated filament measure; adjust the firmware if the measured extrusion differs by more than 2 %.
- Inspect the nozzle for residue; replace it using the quick‑swap mechanism (3 seconds) if wear or clogging is evident.
- Check the Bowden tube or direct drive path for kinks that could restrict filament flow.
These actions address the majority of under‑extrusion cases caused by mechanical inconsistencies.
Temperature Management
Both delamination and under‑extrusion are highly sensitive to temperature. The Flashforge Adventurer 5M Pro offers a 280 °C all‑metal extruder and pressure‑based auto‑leveling, making it ideal for high‑temperature materials such as PETG and ABS that require stronger inter‑layer adhesion.
Follow these temperature guidelines:
- Set the nozzle temperature 5–10 °C above the filament’s recommended range to improve melt flow without causing stringing.
- Maintain the heated bed at 60 °C for PLA, 70–80 °C for PETG, and 100 °C or higher for ABS to reduce thermal contraction.
- Enable the enclosure (available on the Pro model) to minimize drafts that cause rapid cooling and delamination.
Use a thermal camera or an external thermometer to verify that the reported temperatures match the actual values, especially on older printers where thermistor drift may occur.
Optimizing Slicer Settings
The slicer translates a 3D model into printable G‑code. Incorrect settings can force the printer to extrude insufficient material or to print layers too quickly for the filament to bond. The Flashforge Adventurer 5M Pro integrates with Flash Maker and Orca‑Flashforge, both of which support advanced flow‑rate compensation and adaptive layer height.
Key slicer parameters to adjust:
- Flow Rate: Increase by 2–5 % if walls appear thin.
- Print Speed: Reduce travel speed for the first few layers (20–30 mm/s) to promote adhesion.
- Cooling Fan: Lower fan speed for materials that benefit from slower cooling, such as ABS.
- Retraction Settings: Excessive retraction can cause filament grinding and under‑extrusion; set retraction distance to 1–2 mm for direct‑drive systems.
After each change, print a calibration cube and evaluate the results before proceeding to larger models.
Material Considerations
Different filaments have distinct flow characteristics. The Bambu Lab P1S supports a wide range of materials, including TPU, PETG, and PC, and its high acceleration (20 000 mm/s²) can expose weaknesses in filament quality.
When using flexible or composite filaments, ensure the extruder’s grip is sufficient and that the nozzle diameter matches the filament’s recommended size. For example, a 0.25 mm nozzle provides higher resolution but is more prone to clogging with carbon‑filled filaments.
Store filament in a dry box to prevent moisture absorption, which can cause bubbling and inconsistent extrusion, leading to both delamination and under‑extrusion.
Environmental Factors
Ambient temperature and airflow affect cooling rates. Printing in a climate‑controlled room (20–25 °C) reduces thermal gradients. The Flashforge Adventurer 5M Pro includes an enclosure that shields prints from drafts, making it especially useful for ABS and polycarbonate parts.
If an enclosure is not available, consider a simple DIY solution: place a clear acrylic box around the printer and add a small heater to maintain a stable internal temperature.
Comparison and Selection Guide
Choosing the right printer can prevent many troubleshooting steps. The following table compares the five featured models on criteria relevant to delamination and under‑extrusion.
| Model | Price | Build Volume (mm) | Nozzle Max Temp | Auto‑Leveling | Enclosure | Rating |
|---|---|---|---|---|---|---|
| Flashforge Adventurer 5M | $249 | 220×220×220 | 280 °C | Yes (single‑click) | No | 3.9/5 (2,481 reviews) |
| Bambu Lab P1S | $399 | 260×260×260 | 300 °C (estimated) | Yes | Yes (enclosed) | 4.5/5 (329 reviews) |
| Bambu Lab A1 Mini | $245 | 220×220×220 | 260 °C | Yes | No | 4.4/5 (132 reviews) |
| Flashforge Adventurer 5M Pro | $379 | 220×220×220 | 280 °C | Pressure‑based | Yes | 4/5 (1,031 reviews) |
| Flashforge AD5M | $249 | 220×220×220 | 280 °C | One‑click | No | 4.2/5 (353 reviews) |
For users primarily printing PLA or PETG and seeking a low‑maintenance solution, the Flashforge Adventurer 5M offers reliable auto‑leveling at an entry‑level price. Professionals requiring an enclosure and higher temperature stability should consider the Flashforge Adventurer 5M Pro or the Bambu Lab P1S, both of which deliver superior thermal control.
Best Practices & Tips
Beyond hardware and settings, adopt these habits to keep delamination and under‑extrusion at bay:
- Run a weekly nozzle cleaning routine using a cold pull with nylon filament.
- Calibrate the extruder after any filament change; small variations in filament diameter affect flow.
- Use a calibrated bed surface such as a PEI sheet (included on most Flashforge models) and avoid excessive glue sticks that can interfere with adhesion.
- Monitor prints remotely via the Flash Maker app or Bambu Studio to catch failures early and stop the job before waste accumulates.
- Maintain firmware updates; many manufacturers release temperature compensation patches that improve layer bonding.
Implementing these practices reduces the need for reactive troubleshooting and extends the lifespan of the printer.
Frequently Asked Questions
Q1: Why does my printer extrude fine for the first few layers and then start under‑extruding? This pattern often indicates a clogged nozzle that heats up enough initially but then accumulates residue as the temperature stabilizes. Perform a cold pull and verify nozzle clearance.
Q2: Can I print ABS on the Adventurer 5M without an enclosure? ABS is prone to warping; without an enclosure, rapid cooling causes delamination. Use a makeshift enclosure or print with a heated chamber accessory.
Q3: How do I know if my filament is too moist? Moist filament produces popping sounds and inconsistent extrusion. Weigh the filament before and after drying; a loss of 0.5 % indicates significant moisture.
Q4: Is increasing fan speed ever a solution for under‑extrusion? No. Higher fan speed cools the filament faster, which can worsen under‑extrusion. Adjust fan speed only to control surface finish, not flow.
Q5: My printer reports “Machine Busy” after a firmware update. What should I do? Reboot the printer, ensure the USB or network connection is stable, and re‑flash the latest firmware if the issue persists.
Q6: Does using a larger nozzle reduce the risk of under‑extrusion? A larger nozzle lowers back‑pressure, making extrusion more reliable, but it also reduces resolution. Choose a nozzle size that matches the part’s tolerance requirements.
Q7: How often should I recalibrate the bed? Perform auto‑leveling before each print session; if the printer is moved or the build plate is replaced, recalibrate immediately.
Conclusion
Layer delamination and under‑extrusion are symptoms of underlying temperature, flow, or mechanical issues. By following the systematic diagnostic steps outlined above, users can quickly isolate the cause, apply the appropriate fix, and prevent recurrence. Selecting a printer with robust auto‑leveling, reliable temperature control, and an enclosure—such as the Flashforge Adventurer 5M Pro or the Bambu Lab P1S—provides a solid foundation for consistent results.
Combine hardware calibration, proper slicer configuration, and disciplined material handling, and the frequency of failed prints will drop dramatically. The guide empowers readers to troubleshoot confidently and choose equipment that aligns with their workflow.
Products Featured in This Guide
Flashforge Adventurer 5M
Price: $249.00 | Rating: 3.9/5 (2,481 reviews)
Featured for its one‑click auto‑leveling, CoreXY structure, and affordable price, making it ideal for demonstrating basic calibration and extrusion troubleshooting.
Bambu Lab P1S
Price: $399.00 | Rating: 4.5/5 (329 reviews)
Chosen for its enclosed design, high speed, and broad material compatibility, which help prevent thermal‑related delamination.
Bambu Lab A1 Mini
Price: $245.00 | Rating: 4.4/5 (132 reviews)
Compact and quiet, this model illustrates how beginner‑friendly features such as automatic calibration reduce user‑induced errors that cause under‑extrusion.
Flashforge Adventurer 5M Pro
Price: $379.00 | Rating: 4/5 (1,031 reviews)
Its pressure‑based auto‑leveling, enclosure, and higher temperature capability make it the premium choice for eliminating delamination in demanding materials.
Flashforge AD5M
Price: $249.00 | Rating: 4.2/5 (353 reviews)
Highlighted for its quick‑release nozzle and Orca‑flashforge slicer integration, which streamline filament changes and reduce under‑extrusion caused by nozzle wear.