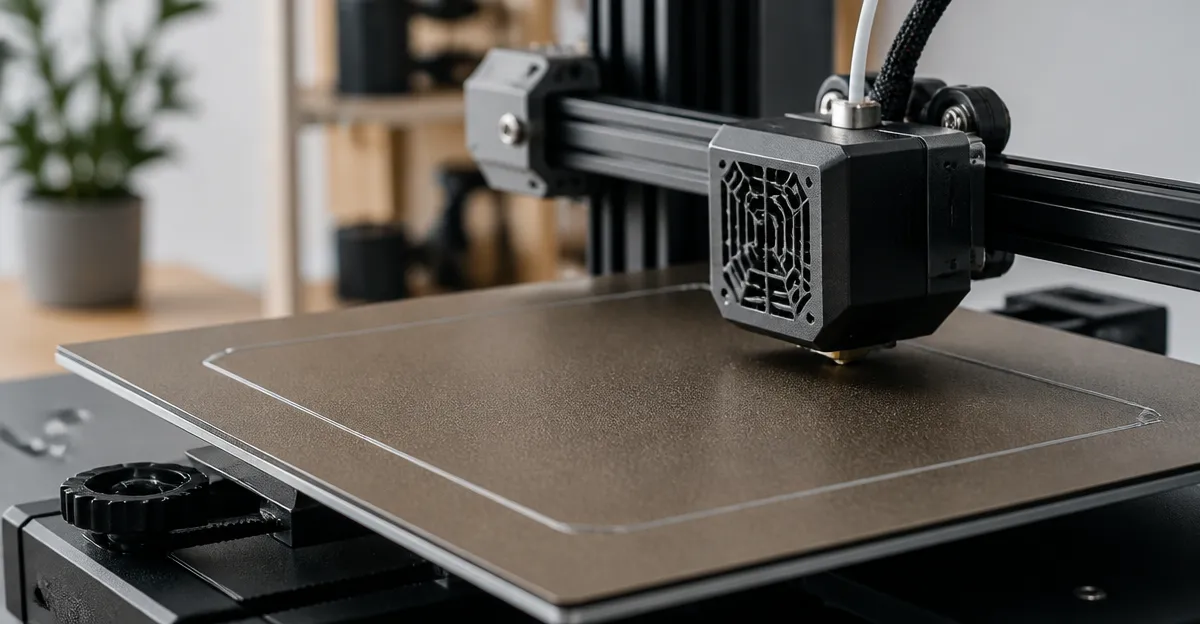
How to Calibrate the First Layer on a PEI Sheet: Step‑by‑Step Guide to Z‑Offset, Bed Leveling & Perfect 3D Print Adhesion
Introduction
Accurate first‑layer calibration is the foundation of every successful 3D print. When a printer uses a PEI (Polyetherimide) sheet, the balance between adhesion and easy removal becomes especially critical. This guide will teach the reader how to configure Z‑offset, perform systematic bed leveling, and achieve consistent first‑layer adhesion on any printer that accepts a 235 mm PEI surface. By following the procedures, the reader will reduce failed prints, improve surface finish, and extend the life of the build platform.
The instructions are applicable to popular Creality and compatible machines such as the Ender 3 V3, Ender 3 Pro, and any printer that supports a 235 mm magnetic PEI plate. The guide assumes a basic familiarity with printer firmware menus but provides detailed explanations for each action. The reader will also discover which commercial PEI products simplify the workflow and why they are recommended over generic alternatives.
What You’ll Need
- Magnetic PEI build plate (e.g., Comgrow Ender 3 V3 KE PEI Plate)
- Isopropyl alcohol (90 % or higher) for surface cleaning
- Digital caliper or ruler for measuring nozzle height
- Bed temperature sensor or infrared thermometer (optional but helpful)
- Firmware access (Marlin, Klipper, or printer‑specific UI)
- Bed leveling tools – paper sheet, feeler gauge, or dedicated probe
All of the recommended PEI plates are available on Amazon and include magnetic backing, high‑temperature resistance, and a textured surface that improves adhesion across a wide range of filaments.
Step‑by‑Step Instructions
1. Install the PEI Sheet Correctly
The first physical step is to attach the PEI sheet to the heated bed. The Comgrow Ender 3 V3 KE PEI Plate offers a premium PEI coating, spring‑steel core, and a strong magnetic base that remains stable through repeated heating cycles. Its price of $12.99 and rating of 4.6 / 5 from 610 reviews indicate high value for budget‑conscious makers.
To install, remove any existing glass or build surface, clean the metal bed with isopropyl alcohol, and align the double‑handle positioning holes with the stock mounting points. The magnetic layer will snap into place, and the spring steel will flex slightly to ensure full contact. The user should verify that the plate sits flush without visible gaps.
Why this product is useful: the magnetic attachment eliminates the need for adhesives, while the spring steel provides the flexibility required to pop prints off after cooling. Competing sheets often rely on permanent glue, which can damage the original bed during removal.
2. Clean and Prepare the PEI Surface
Even a high‑quality PEI sheet can accumulate dust or residual filament oils. A quick wipe with 90 % isopropyl alcohol removes contaminants and restores the surface energy needed for strong first‑layer adhesion. For users who prefer a pre‑laminated adhesive sheet, the Gizmo Dorks PEI Build Surface includes a 3M 468MP adhesive that bonds directly to glass. Priced at $15.95 with a 4.6 / 5 rating from 612 reviews, this product simplifies installation for printers that lack a magnetic bed.
Apply the sheet by peeling the protective liner, aligning it to the glass, and using a rolling motion to expel air bubbles. After placement, heat the bed to 60 °C for five minutes to allow the adhesive to cure. This step is optional when using a magnetic plate, but the cleaning routine remains identical.
Why cleaning matters: a clean PEI surface ensures uniform heat transfer and prevents localized adhesion failures that can cause warping or filament detachment during the first few layers.
3. Set the Appropriate Bed Temperature
PEI works well with a wide range of filaments, but each material benefits from a specific bed temperature. As a rule of thumb, set the heated bed to 60 °C for PLA, 100 °C for ABS, and 70 °C for PETG. The magnetic plates recommended above tolerate temperatures up to 120 °C, allowing the user to experiment with higher‑temperature polymers such as Nylon or PC.
Before proceeding to leveling, pre‑heat the bed for at least three minutes. This ensures that thermal expansion of the spring steel does not alter the perceived flatness during the subsequent steps.
4. Perform Coarse Bed Leveling
With the bed at operating temperature, use the printer’s built‑in leveling routine or manually adjust the four corner screws. The goal is to achieve a uniform gap between nozzle and bed across the entire surface. A simple method is to slide a standard printer paper (approximately 0.1 mm thick) under the nozzle at each corner and the center. The paper should feel a slight resistance when the nozzle is correctly positioned.
For printers equipped with a BLTouch or similar probe, run the automatic mesh‑bed leveling sequence. The magnetic PEI plates from Comgrow (both the Comgrow Magnetic PEI Build Plate at $12.99, rating 4.5 / 5, and the Comgrow PEI Build Plate at $12.99, rating 4.6 / 5) provide a perfectly flat reference surface that improves the accuracy of probe‑based measurements.
Why a magnetic plate is advantageous: the flexible steel eliminates the need to recalibrate the probe height after each print, because the surface does not warp under repeated heating cycles.
5. Adjust the Z‑Offset
The Z‑offset determines the exact distance between the nozzle tip and the PEI surface when the printer reports a Z‑height of zero. An incorrect offset leads to either a squished first layer (causing filament to spread excessively) or a lifted first layer (causing poor adhesion). To fine‑tune the offset, follow these steps:
- Home all axes and move the nozzle to the center of the bed.
- Set the bed temperature to the target value for the filament you intend to use.
- Using the live‑adjust Z menu, lower the nozzle in 0.05 mm increments until a thin line of filament is extruded that slightly compresses the PEI surface without tearing it.
- Observe the printed line. If the filament spreads beyond the intended width, raise the nozzle by 0.05 mm and re‑test.
- Save the final Z‑offset value to EEPROM or the printer’s configuration file.
The Creality Official PEI Plate (price $15.99, rating 4.8 / 5 from 724 reviews) includes a double‑sided PEI sheet that can be used on either side, providing flexibility for users who wish to experiment with different adhesion levels without changing the Z‑offset.
6. Verify First‑Layer Quality
After saving the Z‑offset, start a simple single‑wall cube or a calibration skirt. Examine the first layer for the following characteristics:
- Uniform extrusion width across the entire perimeter.
- No gaps between the filament and the PEI surface.
- Minor “squish” visible as a slight flattening of the filament, indicating good contact.
- Easy removal after the bed cools to room temperature.
If any of these criteria are not met, return to step 5 and adjust the offset by another 0.02 mm increments. Repeat until the desired balance is achieved.
7. Save Settings and Create a Backup
Once the first layer prints flawlessly, store the configuration in the printer’s non‑volatile memory. Many firmware packages allow the user to export the current configuration to a file on the SD card. Keeping a backup ensures that future firmware updates or accidental resets do not erase the calibrated values.
For advanced users, consider creating a dedicated G‑code macro that restores the saved Z‑offset and bed temperature before each print. This practice eliminates human error and guarantees repeatable results across multiple machines.
Tips & Pro Tips
- Use a digital caliper to measure the actual nozzle‑to‑bed distance after the printer reports Z‑0. This provides an objective reference.
- When printing with ABS, increase the bed temperature to 100 °C and enable an enclosure to reduce thermal gradients.
- Apply a light coat of hairspray or a glue stick only if the first layer still detaches on tall prints; the PEI surface should normally not require additional adhesives.
- Periodically clean the PEI sheet with isopropyl alcohol. For heavily used plates, a gentle 600‑grit sandpaper rub can rejuvenate the surface without damaging it.
- If you experience “elephant foot” on the first layer, lower the initial extrusion width or reduce the first‑layer height by 0.02 mm.
Troubleshooting
| Problem | Possible Cause | Solution |
|---|---|---|
| First layer does not stick | Bed temperature too low or Z‑offset too high | Increase bed temperature by 5 °C and lower Z‑offset in 0.05 mm steps. |
| Filament spreads excessively | Z‑offset too low | Raise Z‑offset until the line width matches the nozzle diameter. |
| Air bubbles under PEI sheet | Improper installation of adhesive sheet | Remove the sheet, clean the glass, and reapply using a rolling motion as described for the Gizmo Dorks sheet. |
| PEI surface scratches | Use of metal scraper | Employ a flexible plastic spatula or gently flex the magnetic plate to release prints. |
Conclusion
Calibrating the first layer on a PEI sheet involves careful installation, thorough cleaning, precise temperature control, systematic bed leveling, and fine Z‑offset adjustment. By following the steps outlined above, the reader will achieve reliable adhesion, effortless print removal, and consistent dimensional accuracy across all filament types. The recommended PEI products—especially the magnetic plates from Comgrow and the official Creality sheet—provide durable, easy‑to‑use platforms that simplify the entire process.
With a well‑calibrated first layer, the user can focus on design, slicing, and post‑processing rather than troubleshooting failed prints. Continued maintenance of the PEI surface and periodic re‑verification of Z‑offset will keep the printer performing at peak efficiency for years to come.
Products Mentioned in This Guide
Frequently Asked Questions
How do I set the correct Z‑offset for a PEI sheet?
Use the printer’s live Z‑adjust feature to lower the nozzle until a thin filament line is slightly squished against the PEI surface, then save that offset in the firmware.
What is the best method for leveling a PEI bed on an Ender 3 V3?
Run the printer’s auto‑bed‑leveling routine or manually adjust the four corner screws until a piece of paper slides with uniform resistance across the entire sheet.
Why does my first layer sometimes stick too strongly to the PEI plate?
Excessive Z‑offset or a nozzle temperature that’s too high can cause the filament to fuse with the PEI; lower the offset or reduce the nozzle temperature by 5‑10 °C.
Can I use a magnetic PEI sheet on any 235 mm printer?
Yes, as long as the printer’s hot‑bed can accommodate a 235 mm magnetic PEI plate and the firmware supports bed leveling for that size.
What maintenance steps keep a PEI sheet performing well?
Clean the surface regularly with isopropyl alcohol, avoid abrasive scrubbing, and replace the sheet if it shows deep scratches or delamination.