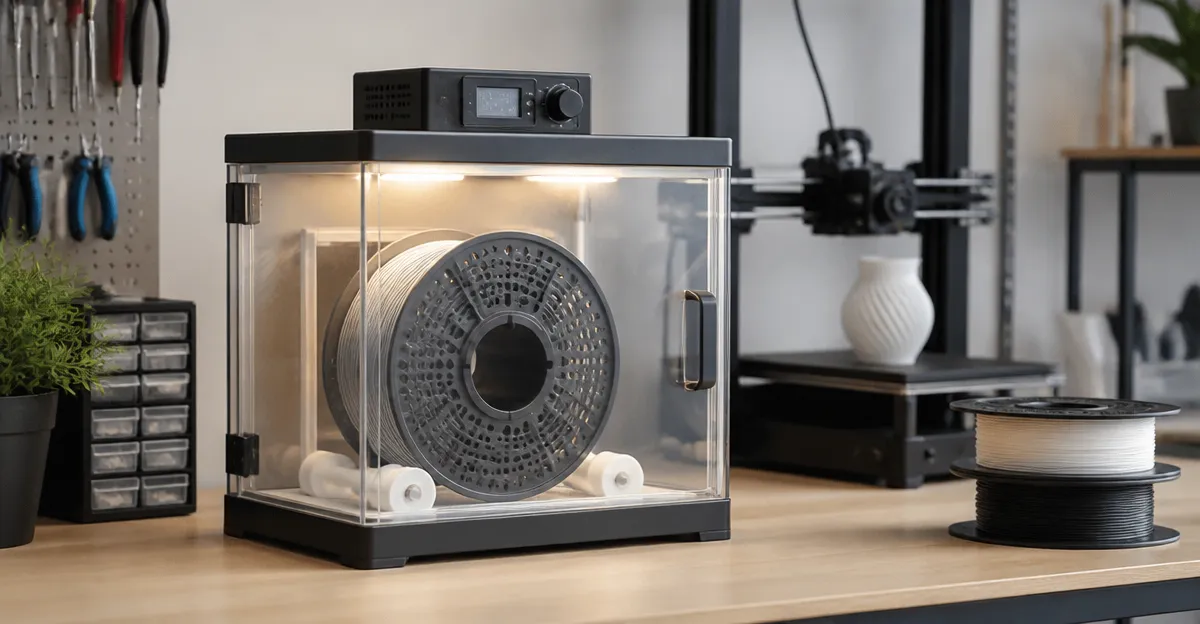
Introduction
Moisture absorbed by 3D printer filament is a common cause of stringing, layer delamination, and nozzle clogs. This guide will teach the reader how to build a reliable DIY filament dryer, explain the science behind filament hygroscopy, and demonstrate how a controlled drying environment improves surface finish and dimensional accuracy. The reader will gain practical skills in selecting insulation, heating elements, airflow management, and sensor integration. By the end of the article, one will be able to assemble a cost‑effective dryer and understand when to use commercial alternatives.
What You’ll Need
- Insulated enclosure (e.g., a medium‑size plastic storage box)
- Silicone heating pad or PTC heater (30 W–50 W)
- Small DC fan (120 mm) for air circulation
- Digital temperature/humidity controller with LCD display
- Thermistor or hygrometer sensor
- Power supply (12 V or 24 V depending on heater)
- Heat‑resistant silicone sealant
- Optional: filament feed tube and PTFE connectors
For readers who prefer ready‑made solutions, the following Amazon products can serve as reference tools or direct replacements for individual components:
- SUNLU Filament Dryer Box S1 Plus – $32.28, 4.3/5 stars
- Comgrow Filament Dryer Box – $43.99, 4.4/5 stars
- SUNLU Filament Dryer S2 – $44.99, 4.3/5 stars
- Creality Space Pi SE Filament Dryer – $49.99, 4.4/5 stars
- Sovol SH01 Filament Dryer – $43.99, 4.2/5 stars
Step 1: Choose and Prepare the Enclosure
The enclosure must retain heat while allowing controlled airflow. A sturdy plastic storage box with a sealable lid provides a low‑cost base. Measure the interior dimensions; a typical 30 × 20 × 20 cm box accommodates two 1 kg spools and leaves room for a heater and fan. Clean the interior thoroughly to remove dust that could interfere with sensor readings. If the box has ventilation holes, seal them with silicone to improve thermal efficiency.
Commercial alternatives such as the SUNLU Filament Dryer Box S1 Plus already incorporate an insulated shell, but constructing your own enclosure allows customization of capacity and feed‑through geometry.
Step 2: Install the Heating Element
Select a silicone heating pad that matches the box dimensions; a 30 W pad evenly distributes heat across the bottom surface. Attach the pad to the interior using heat‑resistant adhesive, ensuring full contact to avoid hot spots. Connect the pad to a regulated 12 V power supply, and route the wires through a sealed cable gland to maintain enclosure integrity.
The SUNLU Filament Dryer S2 uses dual heating sheets and a 360° fan, delivering a 30 % faster heating rate. For DIY builders, a single heating pad combined with a fan provides comparable results at a lower cost.
Step 3: Add Air Circulation
Uniform temperature prevents filament from developing moisture gradients. Mount a 120 mm DC fan on the side wall, directing airflow horizontally across the spools. Secure the fan with brackets and seal any gaps with silicone. Wire the fan to the same power supply as the heater, using a simple on/off switch or integrating it into the controller’s output.
The Comgrow Filament Dryer Box features a built‑in fan that circulates air through a silicone‑sealed outlet, demonstrating how effective airflow reduces drying time.
Step 4: Mount Temperature and Humidity Sensors
Accurate monitoring is essential for repeatable results. Install a digital temperature/humidity sensor near the center of the chamber, away from direct contact with the heater. Connect the sensor to a microcontroller‑based controller (e.g., an Arduino with a LCD shield) that can display real‑time values and control the heater via a relay.
The Creality Space Pi SE Filament Dryer includes a built‑in hygrometer and a 2‑inch LCD, illustrating the value of integrated monitoring for precise drying cycles.
Step 5: Wire the Controller and Set Parameters
Program the controller to maintain a target temperature between 45 °C and 65 °C, depending on filament type. PLA typically dries at 45 °C for 4–6 hours, while PETG and TPU benefit from 50 °C to 55 °C for 8–12 hours. Use the controller’s menu to set the desired temperature, time, and humidity threshold. Enable an automatic shut‑off when the timer expires to prevent overheating.
The SUNLU Filament Dryer Box S1 Plus offers a 2‑inch LCD that lets users adjust temperature (35 °C–55 °C) and drying time, providing a convenient reference for DIY builders.
Step 6: Create a Filament Feed‑Through
If you wish to print directly from the dryer, drill a 10 mm hole near the top of the enclosure and install a PTFE tube with a rubber gasket. The tube should curve gently to avoid filament strain. Seal the opening with silicone to keep moisture out while allowing smooth passage.
The Sovol SH01 Filament Dryer includes four feed openings with optional plugs, demonstrating a practical design for direct feed applications.
Step 7: Test, Calibrate, and Optimize
Place two spools inside the enclosure, close the lid, and start a drying cycle at 50 °C for 6 hours. Observe temperature and humidity readings every 30 minutes. If humidity does not drop below 20 %, increase the temperature by 5 °C or extend the cycle duration. Record the final settings for each filament type in a reference table.
Commercial units such as the SUNLU Filament Dryer S2 provide automatic countdown timers and LED indicators, which can inspire additional features for your DIY controller.
Step 8: Optional Enhancements
For advanced users, consider adding a desiccant compartment or a vacuum‑sealed storage compartment inside the dryer. A small silica‑gel pack can further reduce residual moisture during long‑term storage. Additionally, integrating a Wi‑Fi enabled controller (e.g., ESP32) allows remote monitoring via a smartphone app.
These upgrades mirror the premium experience of the Creality Space Pi SE Filament Dryer, which combines rapid heating with a user‑friendly interface.
Tips & Pro Tips
- Always place the dryer on a heat‑resistant surface; the bottom can reach 65 °C during operation.
- Use a cork or silicone mat to isolate the dryer from the workbench and prevent heat transfer.
- When printing with TPU or nylon, increase the drying temperature to 55 °C–60 °C for optimal results.
- Label each spool with its drying parameters to avoid confusion during multi‑material projects.
- Periodically check the fan for dust buildup; a clean fan maintains efficient airflow.
Troubleshooting
| Problem | Possible Cause | Solution |
|---|---|---|
| Temperature does not reach set point | Undersized heater or poor insulation | Upgrade to a higher‑wattage heating pad or add foam insulation to the box walls. |
| Humidity remains high | Leakage through cable gland or feed‑through | Apply silicone sealant around all penetrations and verify the lid seal. |
| Filament jams at feed tube | Too sharp bend or insufficient fan pressure | Re‑route the PTFE tube with a gentler curve and increase fan speed. |
Conclusion
Building a DIY filament dryer equips the 3D printing enthusiast with precise control over moisture content, leading to smoother surfaces, stronger layer adhesion, and fewer print failures. By following the eight steps outlined above, one can construct a reliable dryer using inexpensive components or adopt a commercial unit such as the SUNLU Filament Dryer Box S1 Plus for immediate results. Consistent drying practices will extend filament lifespan and improve overall productivity.
Readers are encouraged to experiment with temperature‑time combinations, document their findings, and share improvements with the community. A well‑maintained filament dryer is an investment in print quality that pays dividends over countless projects.
Products Mentioned in This Guide
Frequently Asked Questions
Why does filament absorb moisture and how does it affect 3D prints?
Filament is hygroscopic, so it pulls in water from the air, which turns to steam during extrusion causing stringing, layer delamination, and nozzle clogs.
How does a DIY filament dryer compare to commercial dryers?
A DIY dryer provides similar temperature and humidity control at a fraction of the cost, though commercial units may offer faster heating and built‑in safety certifications.
What are the essential components needed to build a DIY filament dryer?
You need an insulated enclosure, a silicone heating pad or PTC heater, a small DC fan, a temperature/humidity controller with sensor, a power supply, and heat‑resistant sealant.
What temperature and humidity settings work best for common filament types?
PLA and PETG dry well at 45‑50 °C and 10‑15 % RH, while ABS and Nylon require 70‑80 °C and below 10 % RH; adjust based on manufacturer recommendations.
How can I add safety features to prevent overheating?
Integrate an over‑temperature cutoff or connect the controller’s alarm output to a relay that shuts off the heater if the set temperature is exceeded.