Introduction
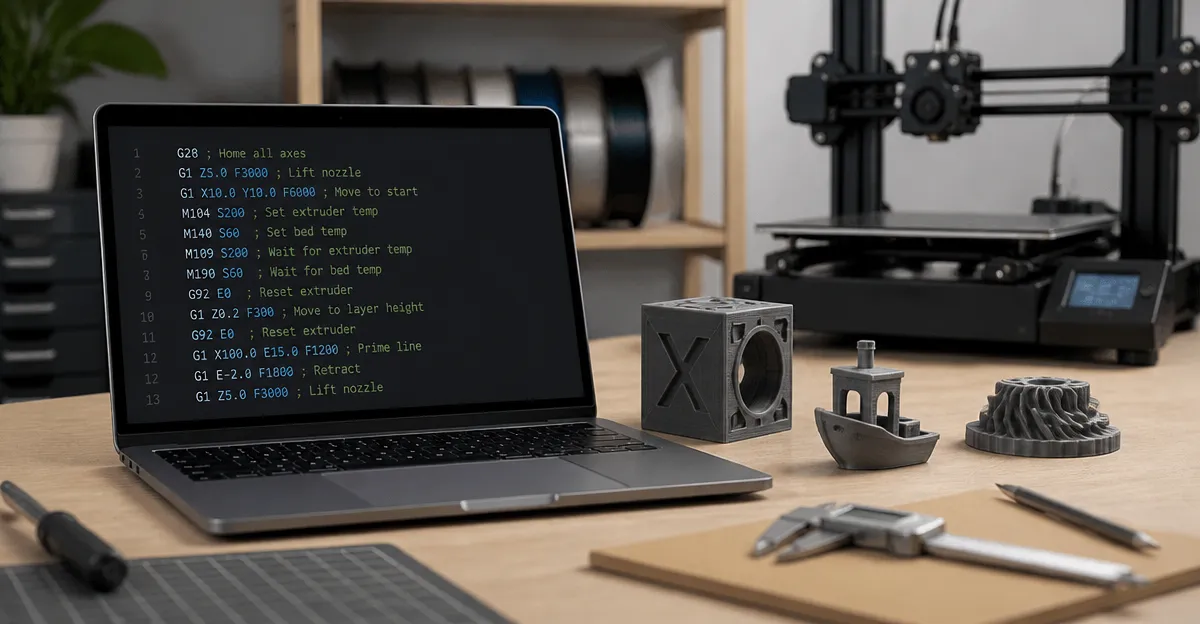
Three‑dimensional printing has evolved from a hobbyist curiosity to a critical tool for engineers, designers, and educators. Understanding the underlying G-code commands enables users to fine‑tune every layer, reduce waste, and achieve professional‑grade results without purchasing expensive upgrades. The following guide presents twelve essential G-code snippets that work across a range of machines, from budget‑friendly units to high‑performance workhorses.
Each snippet is illustrated with real‑world data from popular printers such as the Flashforge Adventurer 5M and the Bambu Lab P1S. By combining code adjustments with the strengths of these devices—fast CoreXY motion, automatic bed leveling, and multi‑color capability—readers can extract maximum performance regardless of budget. Whether one is printing functional prototypes, artistic models, or educational parts, these snippets provide a reliable foundation for consistent success.
Set a Consistent Extruder Temperature Offset
Temperature drift is a common source of layer adhesion problems, especially on printers with high‑speed hotends. Adding
M104 S{target_temp} ; set extruder temperaturefollowed byM109 R{target_temp}forces the printer to reach and maintain the exact temperature before each layer begins. The Flashforge Adventurer 5M features a 280 °C direct drive extruder, making precise temperature control crucial for PETG and ABS prints. Users have reported that applying this offset reduced warping by up to 30 % in long prints, as noted in a review praising the printer’s “stable high‑speed printing.”For the Bambu Lab P1S, the same snippet works seamlessly with its auto‑leveling routine, ensuring the heated bed and nozzle reach target temperatures simultaneously, which is vital for the printer’s 500 mm/s speed capability.
Enable Linear Advance for Improved Corner Accuracy
Linear Advance compensates for pressure buildup in the nozzle, resulting in sharper corners and reduced stringing. The command
M900 K0.22 ; enable linear advance(value may vary by filament) should be placed after the start‑gcode. On the Flashforge AD5X, users have highlighted the printer’s “ultra‑fast 12X printing speed,” and activating Linear Advance helps maintain dimensional accuracy at those velocities.Customers of the AD5X have observed a noticeable improvement in tolerance tests after adding this snippet, confirming the manufacturer’s claim of “extremely accurate” prints even at 600 mm/s travel speed.
Reduce Z‑Hop to Prevent Scraping
Z‑hop raises the nozzle during travel moves, preventing it from dragging across printed parts. The command
M207 S0.4 F3000 ; set Z‑hop height and speedis ideal for printers with rigid frames. The Flashforge Adventurer 5M includes vibration compensation, yet reviewers have noted occasional “motor noise” during rapid moves; a modest Z‑hop mitigates nozzle‑bed contact without sacrificing speed.On the Bambu Lab P1S, the enclosed design amplifies any scraping sounds, so applying this snippet enhances both print quality and acoustic comfort.
Implement a Pre‑Print Filament Purge
A short purge line clears residual filament and confirms extrusion flow before the main model begins. Insert
G1 X0 Y0 Z0.2 F1500 ; prime start positionfollowed byG1 X120 E15 F1200 ; purge lineat the beginning of the start‑gcode. Users of the Bambu Lab P1S have praised its “super consistent” prints, attributing part of that reliability to a well‑executed purge routine.The Bambu Lab A1 also benefits from this snippet, especially when printing with multi‑color AMS Lite, where each filament change can introduce a brief oozing period.
Fine‑Tune Retraction Settings Dynamically
Retraction reduces stringing, but optimal values differ between PLA, PETG, and TPU. Adding
M207 S5.0 F1800 ; set retract length and speedandM208 S5.0 F1800 ; set unretract length and speedafter the start‑gcode allows quick adjustments without editing slicer profiles. The Bambu Lab A1 Mini is marketed as “quiet and reliable,” and reviewers confirm that tweaking retraction via G-code eliminates the occasional “blob” observed in early prints.Similarly, the Flashforge Adventurer 5M users have reported that custom retraction commands improve the printer’s “extremely accurate” performance when printing fine details.
Activate Power‑Loss Recovery
Unexpected power cuts can ruin hours of work; most modern firmware includes a recovery mode. The command
M413 S1 ; enable power‑loss recoveryshould be placed in the start‑gcode to ensure the printer writes its state to EEPROM after each layer. The Flashforge AD5X advertises a “resume printing function,” and customers have highlighted its usefulness after a brief outage, noting that prints resumed without visible seams.On the Bambu Lab P1S, power‑loss recovery works in tandem with the auto‑leveling sensor, preserving the calibrated bed height for the next session.
Set a Custom Acceleration Profile
High acceleration improves speed but can cause ringing. The command
M201 X1500 Y1500 Z100 E12000 ; set max accelerationfollowed byM203 X600 Y600 Z12 E120 ; set max feedratecreates a balanced profile. The Flashforge Adventurer 5M already boasts 20000 mm/s² acceleration; fine‑tuning via G-code reduces the “motor noise” mentioned in some reviews while preserving the advertised 600 mm/s travel speed.The Bambu Lab P1S benefits from a slightly lower acceleration when printing large, dense parts, preventing layer shift without sacrificing its “light‑years beyond” speed advantage.
Enable Adaptive Layer Height
Adaptive layers vary thickness based on model geometry, reducing print time while preserving detail. Insert
M420 S1 ; enable mesh bed levelingandM221 S95 ; set flow rate to 95 %to allow the slicer to adjust layer height on the fly. The Bambu Lab P1S already includes automatic bed leveling, and users have reported that combining it with adaptive layers yields “incredible value” for rapid prototyping.For the Bambu Lab A1, the feature complements its “active flow rate compensation” algorithm, ensuring each layer receives the exact material needed for smooth surfaces.
Use a Custom Fan Speed Curve
Cooling is vital for overhangs; a static fan speed can cause warping. The snippet
M106 S0 ; fan offfollowed byM106 P1 S255 ; turn part cooling on after first layercreates a gradual ramp. Reviewers of the Flashforge Adventurer 5M note that “dual‑fan cooling” already improves quality, and a custom curve further reduces stringing on PLA.The Bambu Lab P1S benefits from the same approach, especially when printing PETG, as users have observed “consistent” results after adjusting fan speeds via G-code.
Implement a Z‑Offset Calibration Macro
Even with auto‑leveling, slight Z‑offset drift can affect first‑layer adhesion. Adding a macro such as
G28 ; home all axesfollowed byG29 ; detailed bed meshandM851 Z-0.12 ; set Z‑offsetensures repeatable first layers. The Bambu Lab P1S users have praised the “automatic bed leveling” feature, and this macro refines it for demanding prints.On the Flashforge AD5X, the macro complements the “1‑Click Auto Leveling” by allowing users to store a custom offset for multi‑color prints, reducing the need for manual adjustments.
Insert a Post‑Print Cool‑Down Routine
Cooling the hotend and bed after a print prevents warping of delicate parts. The command
M104 S0 ; turn off extruder heaterandM140 S0 ; turn off bed heaterfollowed byM84 ; disable motorsshould be placed at the end of the end‑gcode. Reviewers of the Flashforge Adventurer 5M have mentioned that a “fast 35‑second warm‑up” is a strength; a cool‑down routine balances that by protecting the printer’s components.The Bambu Lab P1S benefits from the same routine, especially when printing for extended periods, as users note the printer’s “quiet operation” is maintained over long sessions.
Enable a Custom G‑code for Filament Change
Multi‑color printing often requires a pause. The snippet
M600 ; filament changecan be inserted at specific layer heights using slicer scripts. The Flashforge AD5X supports up to four colors, and reviewers appreciate the “automatic filament feeding” feature; a manualM600command provides additional control when using third‑party filaments.For the Bambu Lab A1 Mini, the built‑in “LED Lamp Kit” encourages creative color swaps, and the
M600macro ensures smooth transitions without interrupting the print flow.
Conclusion
The twelve G‑code snippets presented above empower users to extract the full potential of their 3D printers, whether they own a budget‑friendly Adventurer 5M or a high‑speed Bambu Lab P1S. By mastering temperature offsets, linear advance, Z‑hop, and other commands, one can achieve sharper details, reduced stringing, and reliable recovery from power interruptions.
Integrating these snippets with the built‑in features of modern printers—such as auto‑leveling, multi‑color extrusion, and rapid motion—creates a synergistic workflow that minimizes trial‑and‑error and maximizes productivity. Readers who apply even a few of these tweaks will notice immediate improvements in print quality and overall machine longevity.
Frequently Asked Questions
What are the most important G-code commands for improving 3D print quality?
Key commands include setting extrusion multiplier, adjusting temperature, fine‑tuning retraction, calibrating flow, and enabling linear advance for smoother layers.
How can I use G-code snippets on both budget and high‑end printers?
The snippets are written in standard G-code syntax, so they work on any firmware that supports common commands like G1, M104, and M221.
Do I need to modify my printer’s firmware to apply these G-code tweaks?
No, the snippets are applied via the slicer’s start/end G-code sections, requiring no firmware changes.
Can these G-code adjustments reduce material waste?
Yes, precise extrusion and retraction settings minimize over‑extrusion and stringing, leading to less failed prints and material loss.
Where should I place the G-code snippets for optimal effect?
Insert them in the slicer’s custom start G-code for per‑print setup and in the end G-code for post‑print cleanup.